Grime Art
Want to make a gooey portrait? In this tutorial we’ll show you how to create grime art with the PicsArt draw tool.
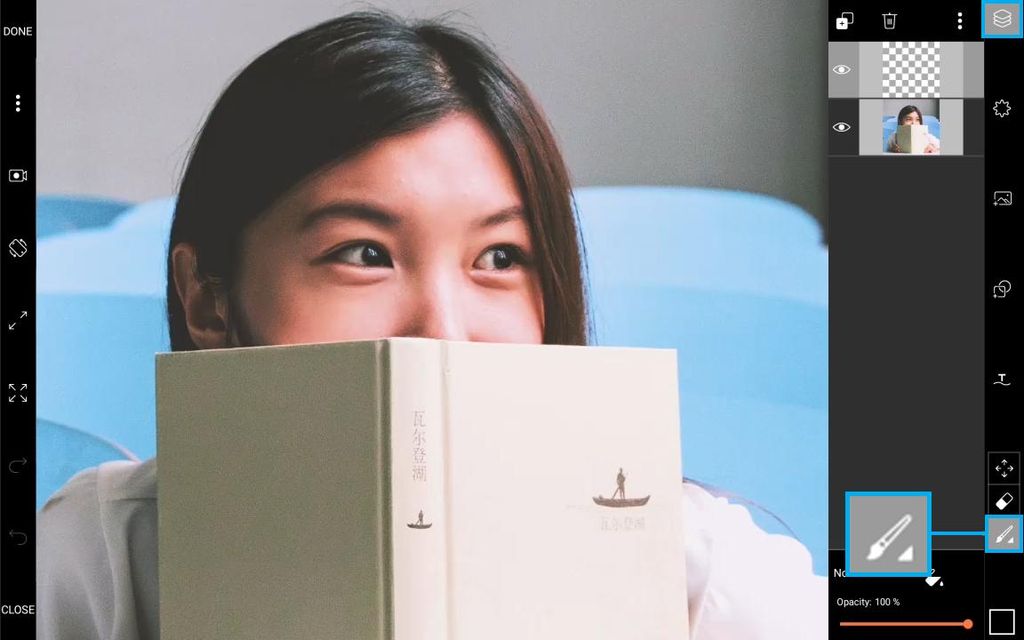
Step 1
Tap on the layer icon in the top right corner to open the Layers panel. Tap on the brush icon in the bottom right corner to open the Brushes menu.
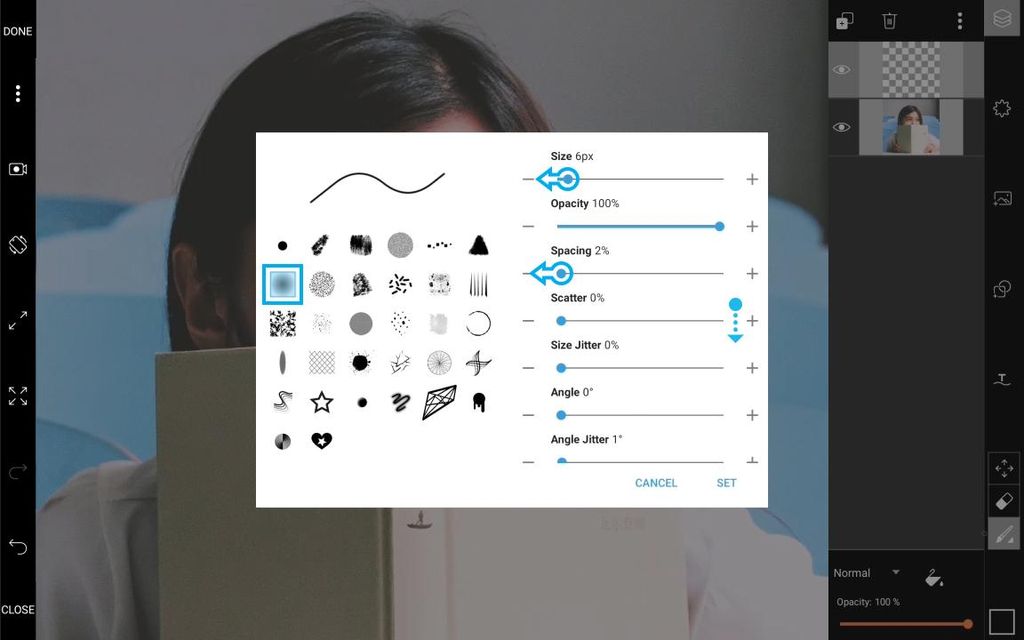
Step 2
Choose the highlighted brush type. Decrease the brush Size by dragging the slider. Decrease the Spacing by dragging the slider. Scroll down to see the bottom part of the options menu.
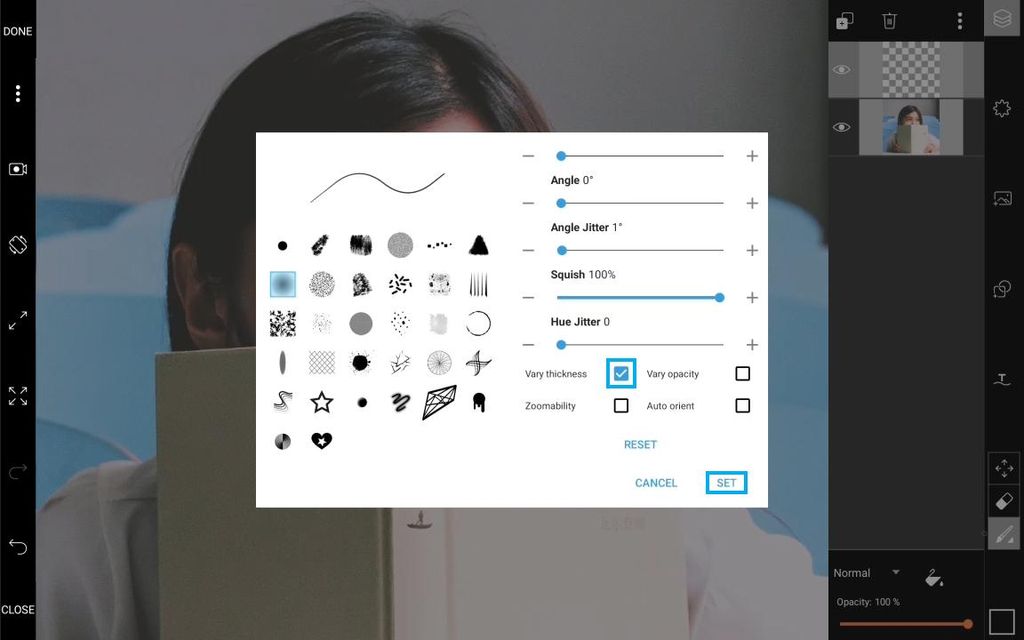
Step 3
Check the ‘Vary Thickness’ box to give the brush marks a natural look. Tap on ‘Set’ to apply your changes.
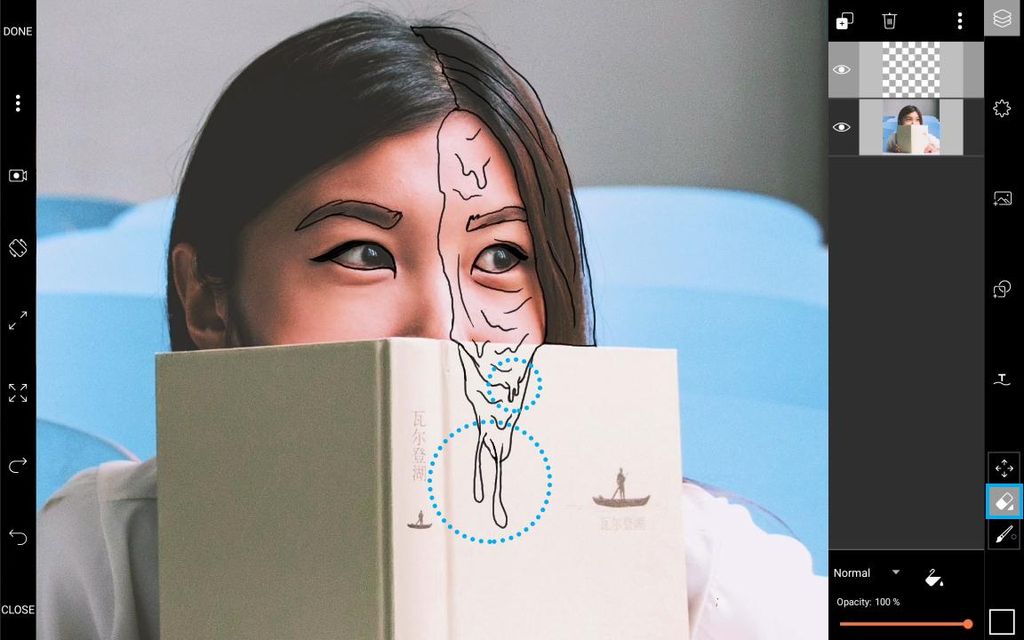
Step 4
Draw an outline around your chosen areas. Tap on the eraser icon to erase unwanted marks.
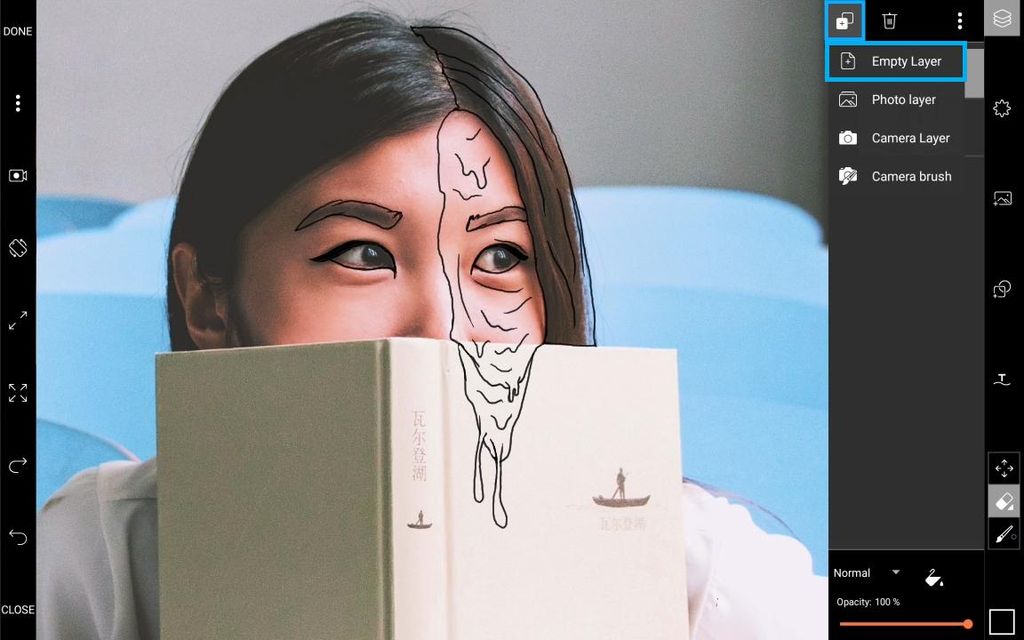
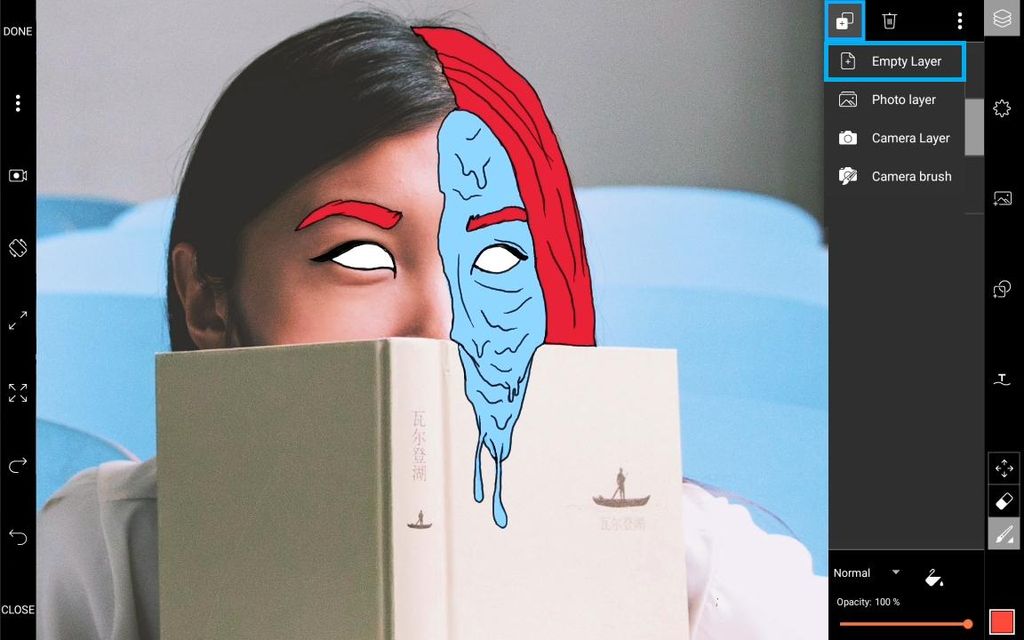
Step 5
Tap on the plus icon at the top and create a new empty layer.
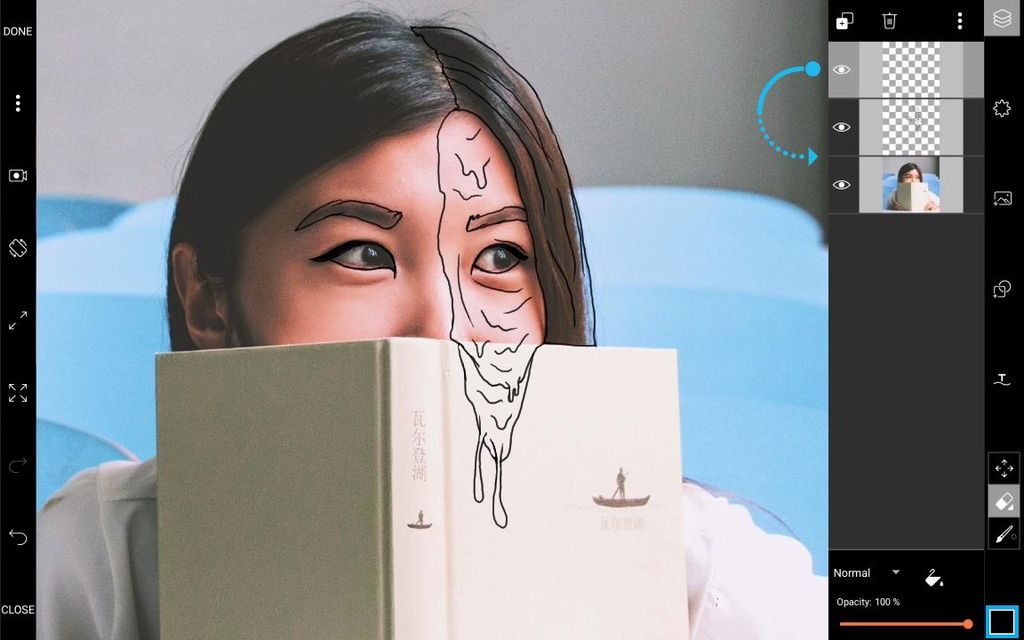
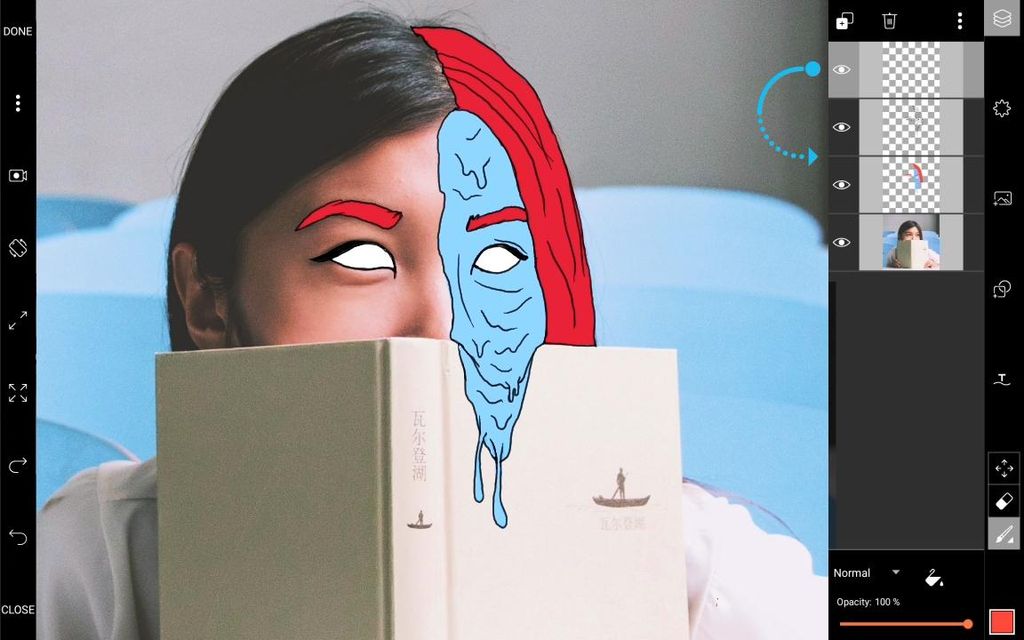
Step 6
Drag the new empty layer under the outline layer by tapping and holding. Tap on the color chooser icon in the bottom corner to open the color menu.
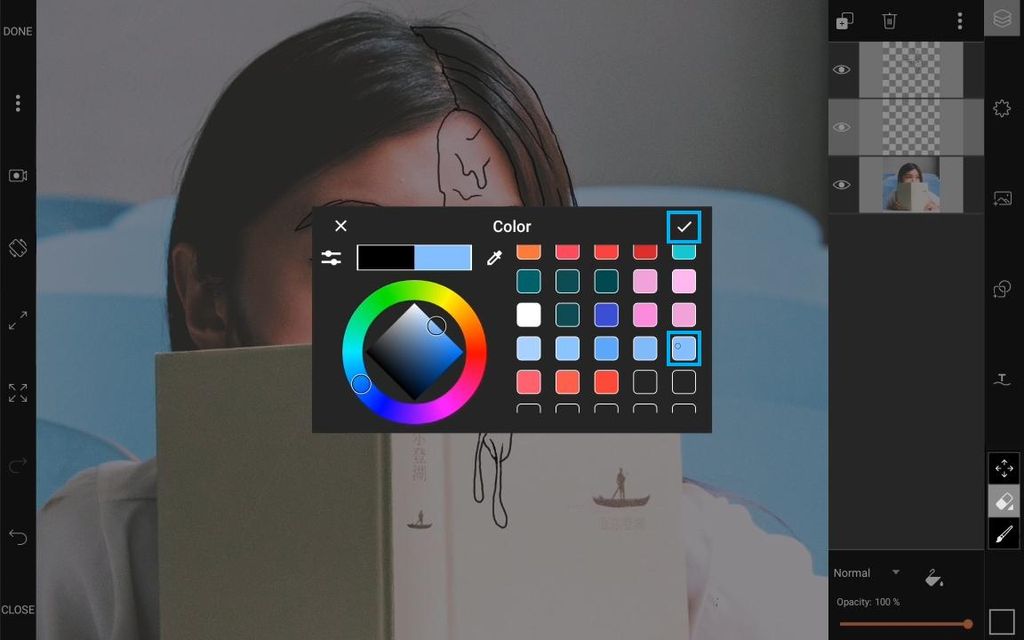
Step 7
Select a color. We're going with a light blue but you're free to choose your own. Tap on the check mark icon to confirm.
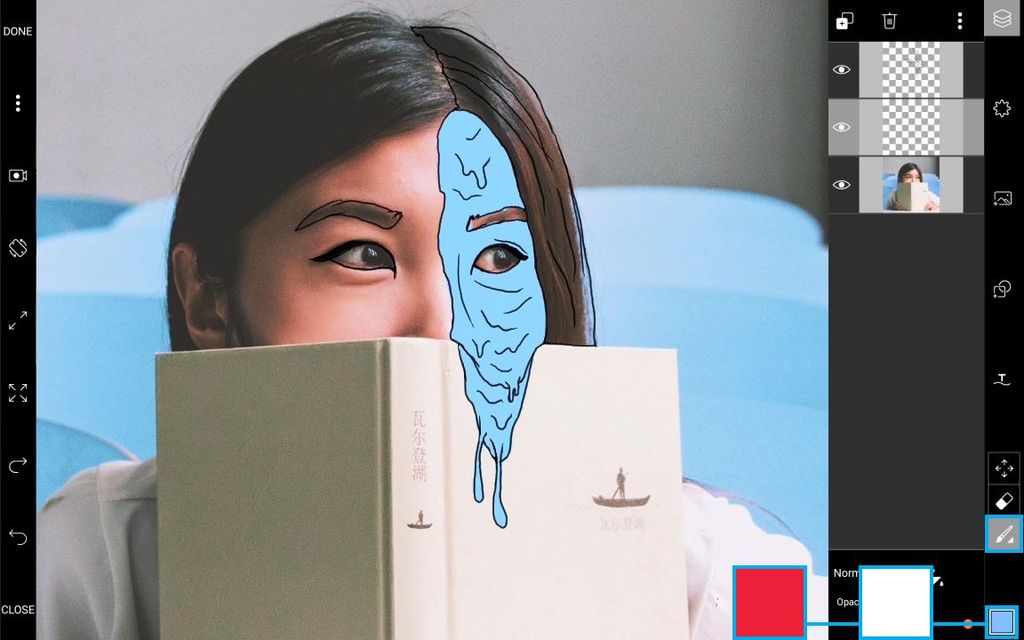
Step 8
Tap on the brush icon. Fill in the outline with color. Repeat with the color red for the hair areas and white for the eyes.
Step 9
Tap on the plus icon and create a new empty layer.
Step 10
Drag the new empty layer below the outline layer.
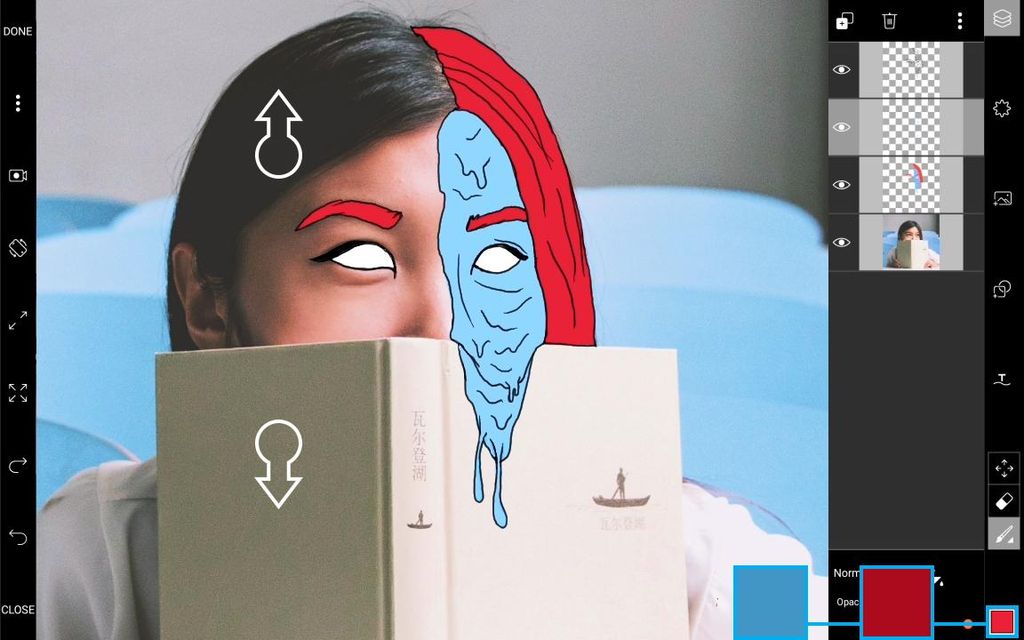
Step 11
Perform a two-finger pinch to zoom in. Tap on the color picker to choose darker shades of color for the next step.
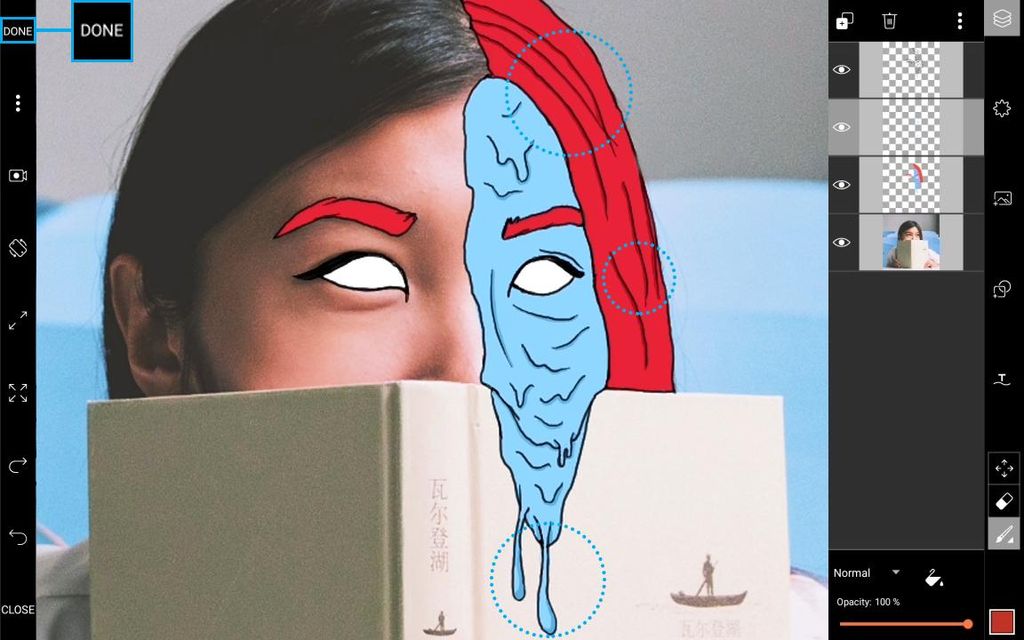
Step 12
Use the darker shades to put in shadows and give your image more natural depth. Tap on ‘Done’ in the top left corner. Share your awesome new grime portrait with the world using the hashtag #GrimeArt.
No comments:
Post a Comment